SEO in Next.js
Author : JaNakh Pon , August 22, 2021
Tags
How to add SEO to Next.js
We are going to add SEO to a demo Next.js app in a few steps:
- Installation and setup
- Get favicons for SEO
- Add SEO/meta tags
Summary
In this article, we are going to add SEO meta tags to _document.tsx instead of adding them to a component and importing to index.ts. So, we can avoid errors like `"next-head-count missing","cannot read content of 'null' and blah blah blah ...😂".
In order To do that, we need to get favicon pack first by uloading an image to favicongenerator and extract the image files into /public/ folder.
Secondly, we need to add meta tags to _document.tsx.
Installation & setup
Let's get started by intializing Next.js app using create-next-app:
  > npx create-next-app next-seo --ts
  > cd next-seo && mkdir src
  > cd src/pages/ && touch _document.tsx
And move the /pages/ folder into /src folder (btw this is optional!)
Now we need to add meta tags for SEO in _document.tsx. Here's the sample tags with values and you may need to modify or add more values to _document.tsx:
import Document, { Html, Head, Main, NextScript } from "next/document";
import React from "react";

const url = `http://localhost:3000/`;
const description = `HaHa | HeHe`
const name = "HaHa"
const social_image = "mstile-150x150.png"

export default class extends Document {
  static async getInitialProps(ctx: any) {
    return await Document.getInitialProps(ctx);
  }

  render() {
    return (
      <Html lang="en" dir="ltr">
        <Head>

          <meta
            name="keywords"
            content="Hello, hola, blah blah"
          />
          <meta name="author" content="Ja Nakh Pon" />
          <meta name="robots" content="index,follow" />
          <meta name="googlebot" content="index,follow" />
          <meta name="description" content={description} />
          <meta name="theme-color" content="#006ABC" />

          {/* openGraph */}
          <meta property="og:title" content={name} />
          <meta
            property="og:description"
            content={description}
          />
          <meta property="og:type" content={"website"} />
          <meta property="og:url" content={url} />
          <meta property="og:locale" content="en_IE" />
          <meta property="og:site_name" content={name} />
          <meta property="og:image" content={social_image} />

          {/* Twitter */}
          <meta name="twitter:site" content={`@ja_nakh`} />
          <meta name="twitter:creator" content={`@ja_nakh`} />
          <meta name="twitter:card" content="summary_large_image" />
          <meta name="twitter:title" content={name} />
          <meta
            name="twitter:description"
            content={description}
          />
          <meta name="twitter:image" content={social_image} />

          {/* Icons */}
          <link rel="canonical" href={url} />
          <link rel="icon" href="/favicon.ico" />
          <link
            rel="apple-touch-icon"
            sizes="180x180"
            href="/apple-touch-icon.png"
          />
          <link
            rel="icon"
            type="image/png"
            sizes="32x32"
            href="/favicon-32x32.png"
          />
          <link
            rel="icon"
            type="image/png"
            sizes="16x16"
            href="/favicon-16x16.png"
          />
          <link rel="mask-icon" href="/safari-pinned-tab.svg" color="#5bbad5" />
          <meta name="msapplication-TileColor" content="#da532c" />
          <meta name="theme-color" content="#006ABC" />
        </Head>
        <body>
          <Main />
          <NextScript />
        </body>
      </Html>
    );
  }
}
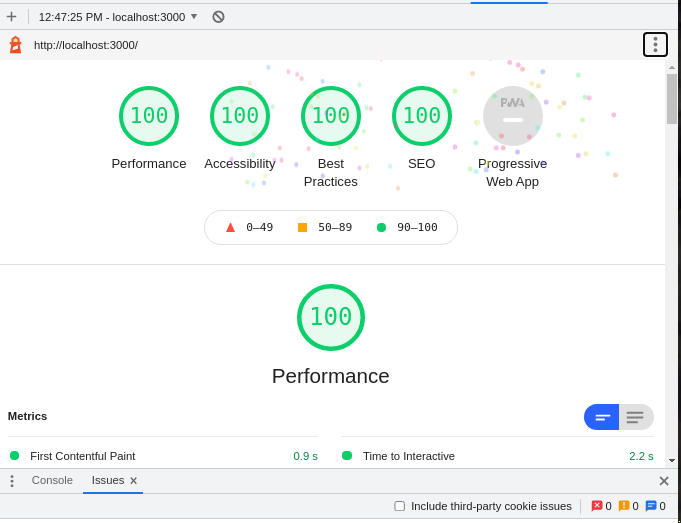
Since everything is ready, let's build it and serve it in local. So, we could check the results using Lighthouse:
 > npm run build && npm run start
 > \\ Open Dev Tools > Lighthouse > Generate reports
and you should see something like this:
Congrats!!! now your next.js app has proper preview image, description and title for sharing in social media such as facebook, twitter alongside the SEO meta tags 😉.